16 February 2016

Swim pants & top


Pants

One of the things I was excited to have the prospect of making for myself when I started sewing was a pair of board shorts, which I have never found in my size in the cool surfwear shops. Well, I still haven't done that as I haven't found a source of microfibre in a print I like. For now, I am very pleased to have made these nylon-spandex swim shorts.

There is no elastic in the waistband, only the ties to ensure they don't come off. I avoided elastic to try to avoid muffin-top misfortunes.

I used medium-weight powernet for the lining for a bit of control. It's not exactly uncomfortable, but doesn't suit the relaxed feel I was seeking for the pants. I would choose a light-weight powernet in the future.

I chose to have the wrong side of the lining towards the body to avoid the seams showing through the shell. I'm not sure whether one way or the other is considered proper.

  I also had another lesson in how fabrics behave differently making these pants. As I was developing and fine-tuning the pattern, I made it up in both a very lightweight rayon jersey and a medium-weight cotton/lycra jersey. Both versions fit loosely, the style I wanted for the swim pants. The nylon/spandex ended up fitting a lot more closely than I was hoping for.

It was my first time sewing nylon-spandex and I was very pleasantly surprised. It behaved beautifully right until I got to hemming the pants. At that point, I had a little difficulty controlling it, so I did some unpicking and took some time to baste first. 


I'm really happy with how they turned out. I think the pattern is a keeper, with some refinements. The style line where the side panel meets the back is a bit crude and I would like to jazz up the tie details.


Top

The top was a bit of a throwaway effort. I needed to come up with a top quickly to match the pants. I would like to make one with separate cups in the future, but this was as much as my drafting skills could handle right now. That said, I was pleased to see my skills have evolved a little as I had tried and failed to figure out some bra concepts about a year ago. I modified this crop-top style bra pattern. As I made changes to the pattern where I thought I needed more room or different shaping, I was delighted to see classic bra pattern shapes emerge on the paper.

The top has a wide waistband with sport elastic to provide support and allow me to get the top over my head as it has no closure.

I added clear elastic to the front neckline and armscythes to prevent gaping. I think I didn't stretch it enough on the armscythes. They are not quite gaping, but the fabric sits less firmly against the skin than I would like. I also added some down to the waistband near the CF aiming for some extra shaping there, but that didn't seem to work.

I used the burrito method (my first time!) to attach the lining to the shell. I understitched the neckline, but realised it would not be possible to do the same for the armscythes (tell me if I'm wrong about that). Unfortunately, the lining does roll out a little.


17 January 2016

And boy shorts for her

 The white pairs were made first, mainly as prototypes for a swim short pattern I am developing. They are made from a two-piece pattern with centre seams front and back. For the blue pair, I added a panel in the crotch (am I right in thinking it's not really a gusset?) to avoid a centre seam running through the crotch.

The blue pair were eked out of scraps left over from my husband's boxer shorts. I wouldn't normally have chosen such a wide elastic, but I wanted these pants to match the boxer shorts. So much fun to have matching undies!

I attached the elastic with a wide zig-zag with the idea of adjusting it after I wear them a bit to check how tight I prefer it. I may also upgrade to the better elastic if I see it holds up well in my husband's boxer shorts (I expect so) and I restock.

Boxer shorts for him

I do love making my boxer shorts. This set has several changes. I refined my pattern to lengthen the inseams and smooth the inseam hem-line. I also finally had the chance to use proper elastic for mens' underwear, am so excited about that as I was not happy with the previous options. Finally, I used an overlocker for construction for the first time. I was pleasantly surprised that even the awkward area under the fly was not too difficult to sew.

Catch-up post

I didn't sew much in 2015! I did only one real creative project, and it's not shown here because it has returned to "unfinished" status as I decided it needed some changes. For the sake of completeness, here is what I did make! Photos my be poor quality because they were not taken for sharing purposes and/or I dislike the garment...
Silver long pants: 100% nylon knit
Grey shorts: 92% cotton, 8% lycra

The pants and shorts above were made in April 2015. I must have decided I'd prefer the elastic waists to sit lower.

But seemingly got distracted while making the adjustment as the waist on the next pair (May) ended up way too low (particularly at the back). Did some piecing to get it a little higher. I don't actually mind the result. However, the fabric pilled immediately upon wearing. Unfortunately, I have some more of it in another colour as well.


Grey long pants: rayon/poly/lycra ponte
Ponte pants piecing

31 July 2014

Lace cardigan


A lightweight cardigan designed for lace. It also needed to be simple because I had to do the whole project in a hurry.

I didn't draft a pattern for this. I drew a sketch with measurements based on other clothes, sewed up a toile, and refined the design from there. I took a leap of faith, because the toile, made in a polyester knit that was significantly less flowing than the lace, looked awful. It didn't drape nicely at all. I hoped that the shape would appear when the cardigan was made up in the lace. Happily, the lace version turned out in line with my expectations.

I considered underlining, but decided to keep just the lace. I'm happy with that decision.

To keep it very lightweight and because I was in a hurry, I didn't add any interfacing or facing at the front. I think this was a mistake as the center front seems to need reinforcing. I received suggestions to add a ribbon or lace trim and intend to try one of those.

I haven't sewn lace before. It sewed up quite easily, but was very fiddly to lay out and stripe match.

30 July 2014

Halterneck-ish top WIP


I love this top.

I'm still working on the pattern. I'm trying to develop a collar rather than strap over the shoulders, but that requires some work on getting the shaping right. I like this version too.

I'm not sure that tucks of the style I used on the back are the best for this type of fabric. They would probably look much better if I managed to stitch them straight, but I'm still not sure.

 I'm really happy with the top, even if has a few faults.


26 July 2014

Tank top with gathered front panel


Tank top with princess seams, gathered center front panel.

Princess seams for design interest and shaping. I included a gathered front panel for design interest and to reduce the transparency of the quite sheer jersey. I don't think it turned all that well.


The fabric is a very lightweight rayon jersey.

Next time I will try it with a plain front and a firmer fabric.

Then neckline is not as drafted. I don't like the shape very much, but it was a successful save of the original neckline, which stretched and flopped. I tried a turned over edge for the first version and it seems to have been a poor choice. The finished version is a band.

I'm quite comfortable sewing jersey, but this very lightweight one was not very easy to sew. My sewing was less than accurate, but I found the top quite forgiving of my errors (trained eyes may beg to differ!).

In a future gathered version, I would like to modify so the drape starts from the shoulder seam and includes a bit of a cowl at the neckline. I wasn't willing to spend the time to develop that this time around.
 

I'm not excited about the top, but will probably end up wearing it until I fill out my wardrobe with tops I like better. It feels nice to wear and should work well enough as a casual top.

22 July 2014

Skirt


Slightly flared skirt with arched yoke. No closure.

Shaped yoke intended for fit and design. The front turned out just I envisioned, but the back was a compromise. My first draft got the fit right, but didn't look good because it was too low. The back yoke slightly cuts into my butt rather than skimming over. I didn't notice it until I finished the final skirt. Once I'd seen it, I could tell on the toile as well.

There is no zipper. I originally intended use an invisible zipper at the CB, but realized I could fit it on over my head (forgot to leave a side seam open on a toile). I should have just put the zipper, because pulling it on immediately introduces creases.

Overall, it is not particularly flattering.
 

Despite lots of sampling, I had plenty of sewing woes that had nothing to do with the pattern. Inexperience was probably the main problem. My flat-felled side seams were a disaster. I ripped out my first attempt as the folded over part escaped in many sections. I lost my nerve when I redid it and decided on "decorative" zigzag stitch. The seam then ended up wavy. The waves disappeared with steam pressing, but I worried they would reappear when the skirt was worn. Luckily, after I wore the skirt for a day, the waves did not reappear.


Big effort, average result.

10 July 2014

Knit summer pants


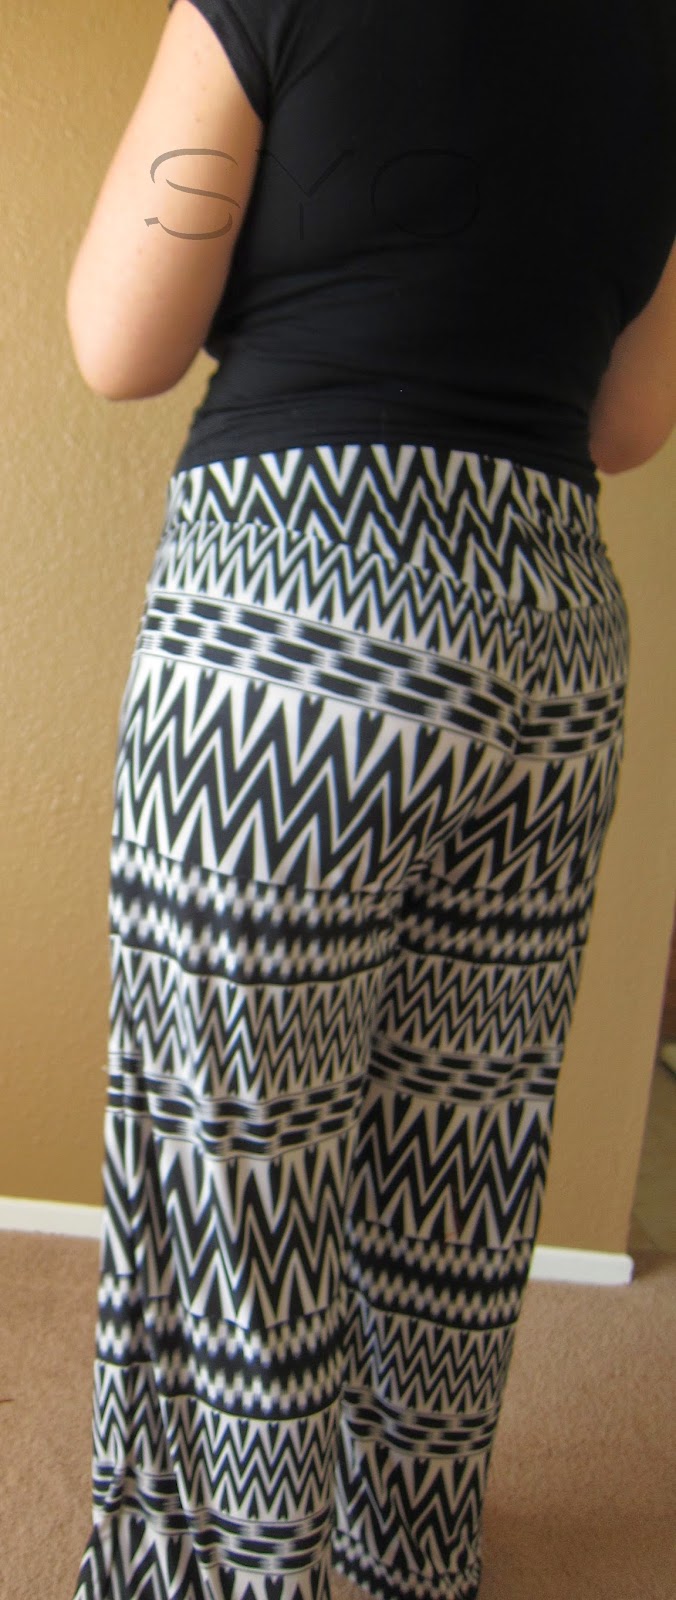
I became obsessed with the idea of a pair of wide leg pants in a crazy fabric, which is not something I have ever worn. I have now satisfied that obsession.

Semi-fitted over stomach, hips, loose to hem. Closure by invisible zipper at side. I wanted a shaped yoke, rather than elastic or a band to avoid cinching over my hips. I wanted the legs to be wide, without excess fabric on inside leg. The outseam falls straight to the hem. The inseam angles toward the knee, then falls straight.

One issue with the faced yoke design and side zipper is that it is not easy to take in. I went ahead with those features anyway, with the logic that if I changed to a design that would be easy to take in, the need would never arise. My logic proved true, but in reverse, as a month or so later, I and need to take them in. On a related note, a few days after I finished them, I read info that made me think I should have used stay tape as well as the interfacing on the yoke (I used a cotton lawn) because the interfacing alone would not provide enough stability to keep them up. To top things off, the zipper got stuck the last time I tried to take them off. So I have three reasons to redo the yoke and zip.

The fabric is very lightweight. I wasn't sure it was suitable and considered underlining. I chose not to underline to keep them light and cool. I will have to wait and see whether the pants are durable.

I need to redraft the waist line of the yoke. The shape is a little odd at the back, in particular.

I am super happy with these pants!


So far, I have only worn them to the supermarket and felt extremely self-conscious. But I do love them, so will try to work up the courage to wear them more!

31 May 2014

Cover up

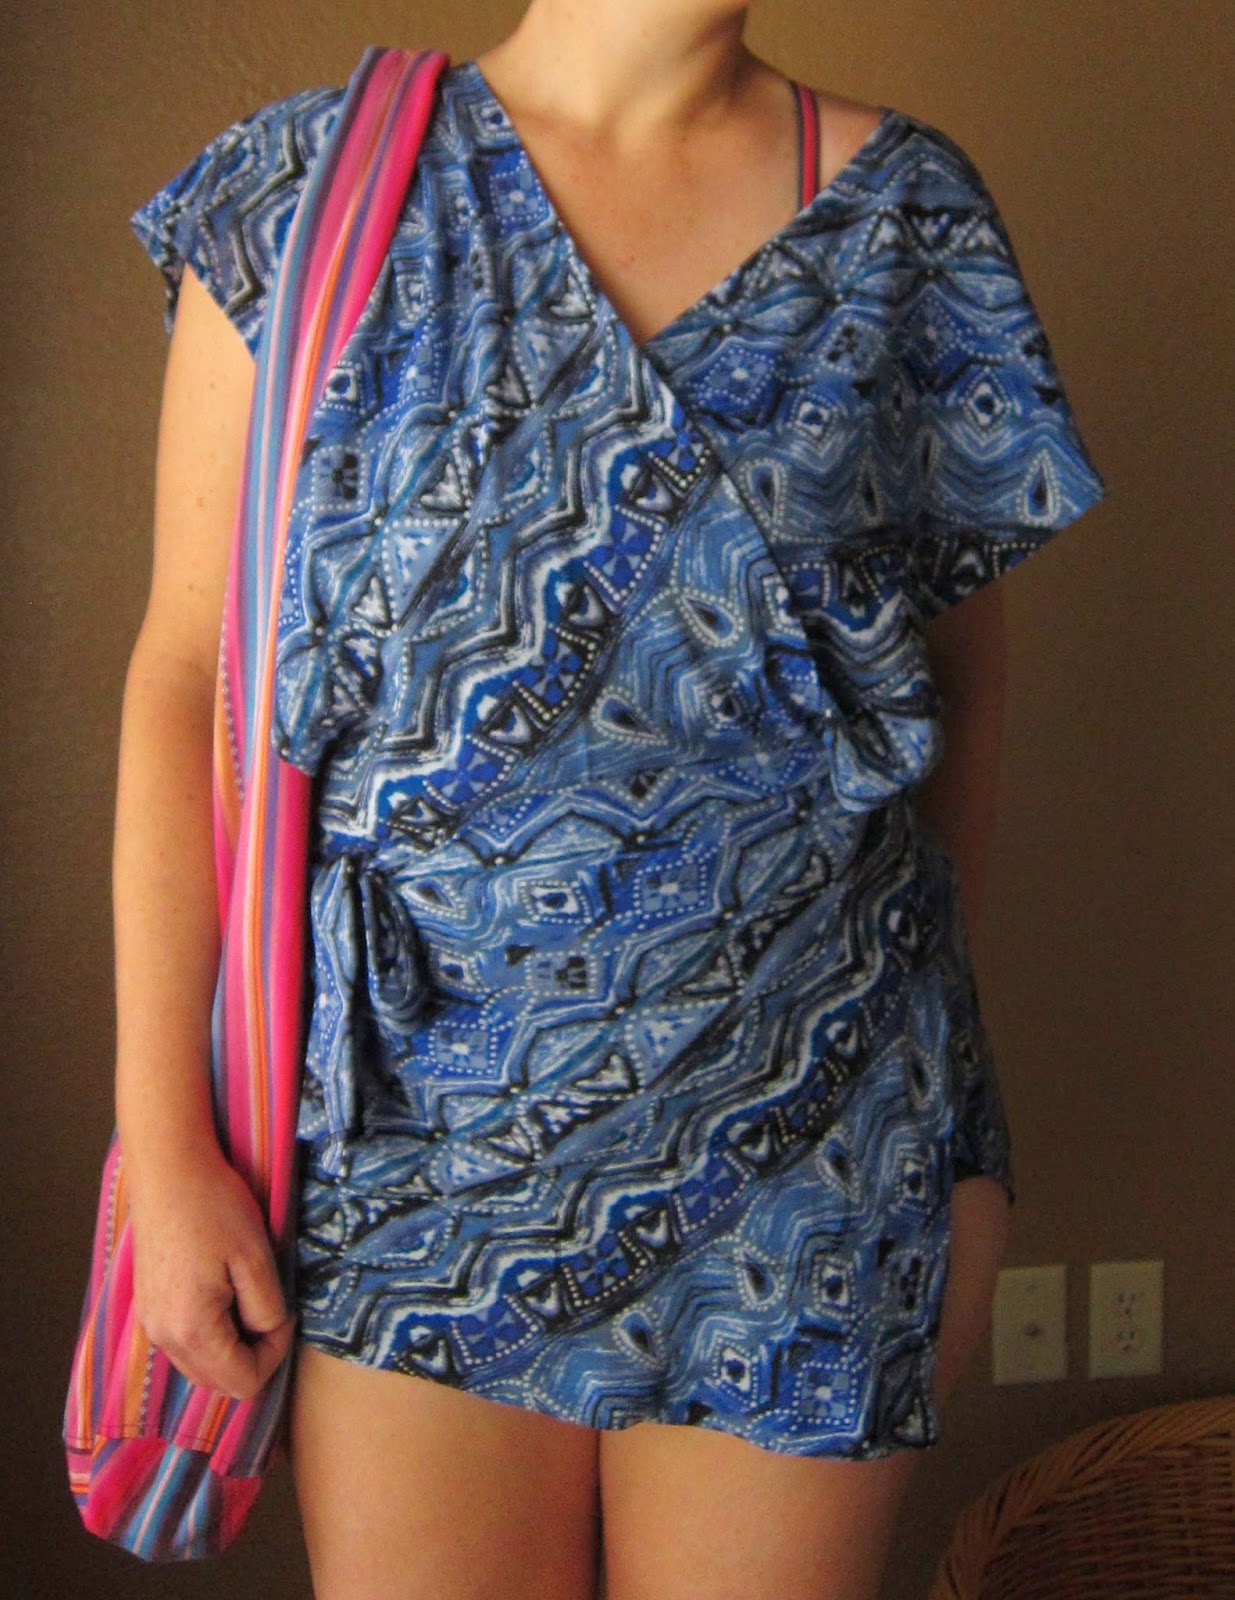
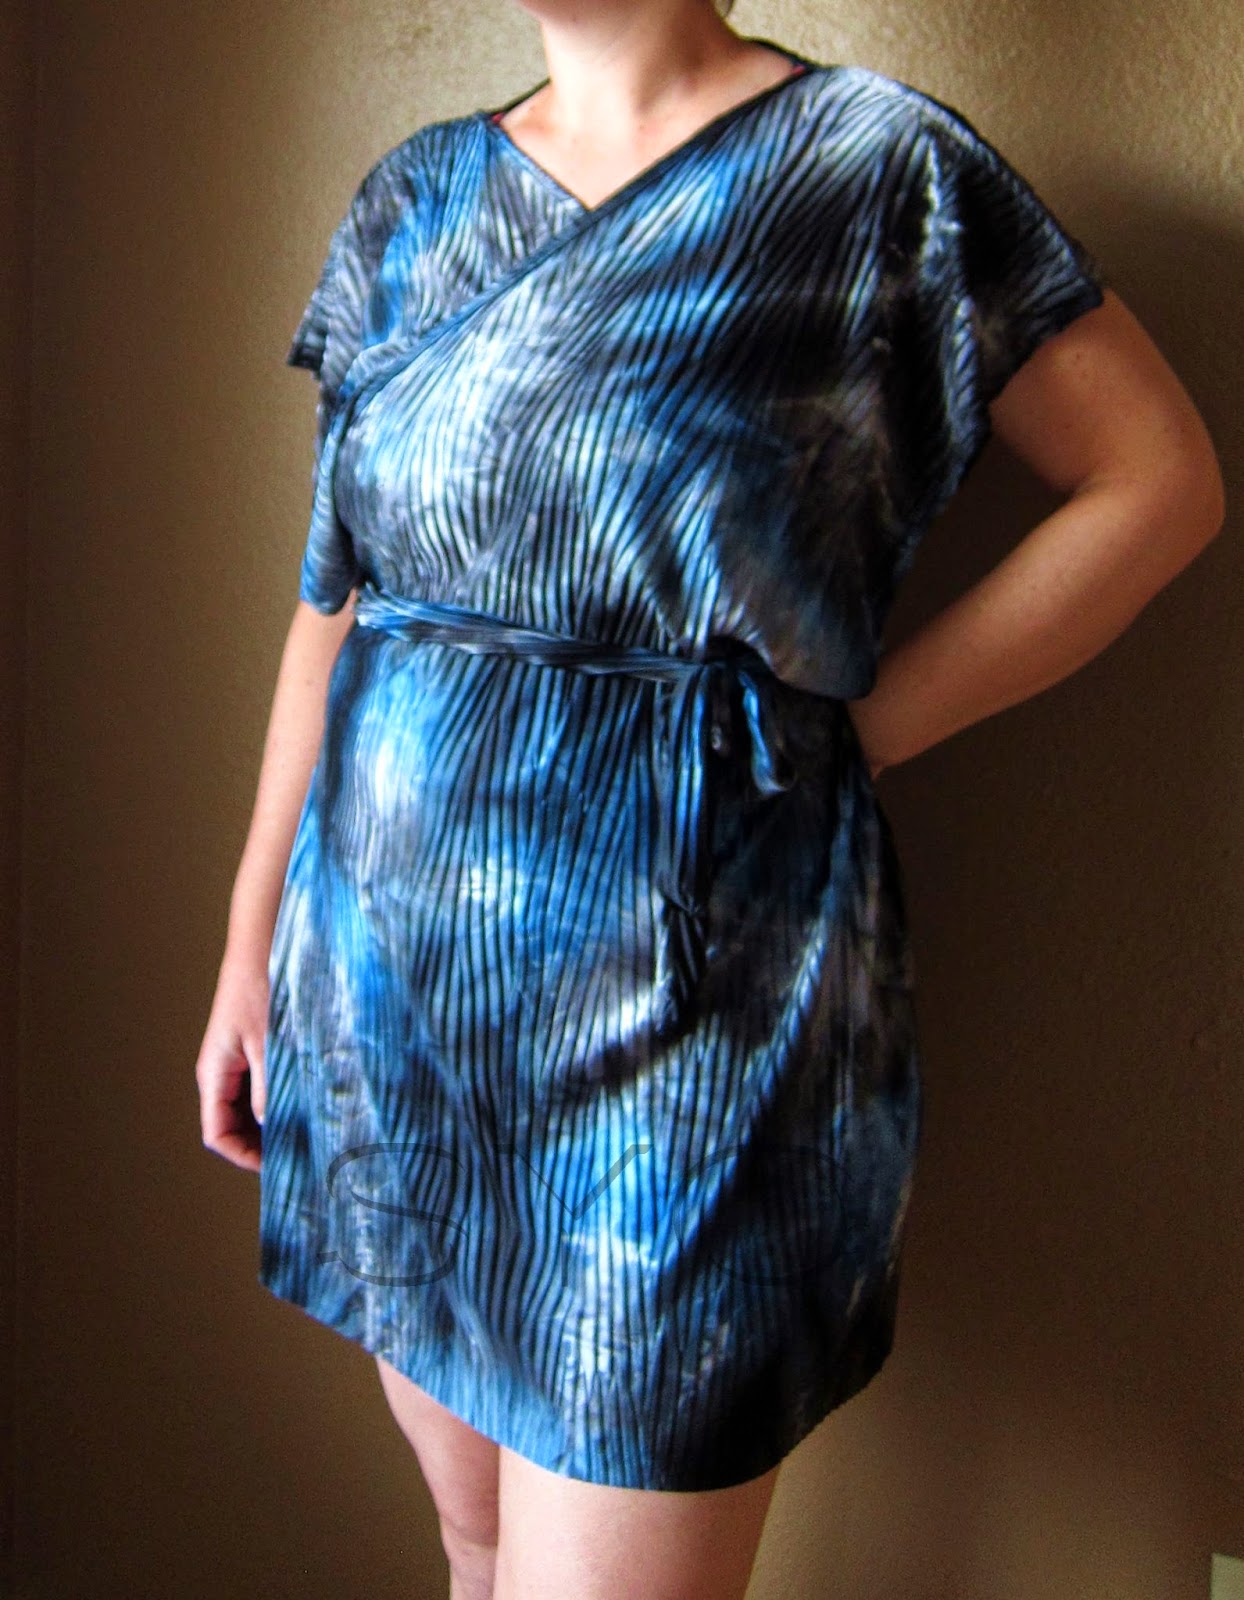
I wanted a cover up to wear to and from the pool. I wanted it to be a wrap and cover the shoulders.

 I sketched my idea. (My sister is the artist in the family, but this made me smile every time I saw it while working on the project.)


The final product.


 I thought this pattern would be well suited to cutting on the bias, but the fabric didn't drape as nicely as I expected. I made some mid-stream alterations and got a bit happy with the roller cutter. It ended up too short. I was ready to call it a wadder, but reversed the wrap over the front and it looked much better.

Below is the prototype (polyester). I wasn't intending to finish it at all, but liked it as I was working on it. I feel it's much more successful than the final product. I'll likely wear it at home.

t


14 May 2014

TNT, though not for me


 It's nice to have a TNT since all my creative projects take oh so long. I still have some fun with these with the coloured top-stitching. I'm down to two evenings for a pair of these (fast for me!).

The elastic is black and matches the shade of the fabric in real life. I used a wider elastic than on previous versions, but I'm still hunting for elastic as nice as that on the RTW boxer shorts these are based on.

05 May 2014

Sleeveless top (unfinished)


My first woven top and collar.

I was aiming for a quite boxy, unfussy top.

It just needs buttons and buttonholes to be completed, but I will leave it unfinished for now.


It's a little tight at the hips, so binds in an unflattering way. I let it out a little at the front side seams, but this adversely affected the princess seam at the bust, which was sitting very nicely in the half muslin I made-drat. I also still have extra fabric at the back neck.

19 April 2014

Bandanna

 Silk bandanna meant for active use outdoors. I want to see if the silk works well to keep me cool in the sun.

I wanted to do a quick and easy project after the previous long drawn-out project. A bandanna, a simple square. Right?

  • I laid out the fabric and lined it up to make it square. Put the ruler down and cut. Move it slightly, and see my straight line turn into a wavy (sneering) mess. Oh boy! Quickly fold it up and put it in the closet. Plan to make something else.
  • Next day, pull it out again. I can do this.
  • Try the rip method, which I haven't yet had any success with on other fabrics. It works, but feels way too destructive to the fabric. Use the alternative method of pulling out a single thread. Tedious, but works.
  • Cut out my square!
  • Decide not to be a martyr and order a rolled hem foot.
  • Order a bunch of other feet while I'm at it.
  • Put the fabric away after all while I wait for the foot (feet) to arrive. Start another project.
  • Feet arrive, wait another week.
  • Practice straight lines a dozen times and a few corners on scrap silk.
  • Finish the bandanna.
  • Most of the hem turns out nice. Fabric is not turned under properly in only a few of spots. Restitch some by machine, some by hand.
  • Done.
  • Next!


01 March 2014

Winter pajama pants and top


 Basic pants and an experimental top.

I love the pants. They fit well and are very comfortable as pajama pants.

The top was an experiment. The concept was a faux jacket over the top of the base layer, but actually sewn as a single top. The whole thing took ages to draft and sew (since I'm a newbie at all this), so I kept dumbing down the design to be done with it more quickly. In the end, I like the deconstructed look of the curling exposed seams, but am very bothered by the unstructured (floppy) area around the neck. Luckily, the seams are falling apart, so I will be rid of it rather soon!


The top was an experiment not just in terms of design, but also in terms of my approach to the learning, design, and sewing process. Turns out I really can't enjoy the results of taking shortcuts (as I expected), so I will try to take the time to learn the techniques needed to achieve the look I'm going for in the future.